Help
Creating FB pixel base tag
In your GTM account, click “Add a new tag”. Name it “FB Pixel Base Tag” and click the “Tag Configuration” section.
There is no unique tag type for Facebook, so we need to select the “Custom HTML” tag type. Paste your FB pixel code into the HTML section.
There is no unique tag type for Facebook, so we need to select the “Custom HTML” tag type. Paste your FB pixel code into the HTML section.
Click the “Triggering” section to assign a trigger to the tag. Select the “All pages” trigger.
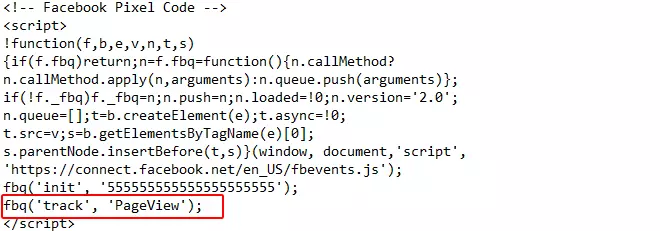
Before we save the tag, remove the “noscript” part from your pixel code.
This part of the pixel code is only executed if the user’s browser does not support JavaScript or it is disabled.
Since GTM is made of JavaScript and will only execute custom HTML if JS is enabled, we need to remove this part from the FB pixel. This is not really a problem because 99% of the browsers support JS and most of the time JS is required for a website to work properly anyway.
If you don’t want to track other FB events, you can go ahead and save your tag, then publish it. But if you want to track other events later, we need to make a little modification.
The FB pixel comes with one event called “PageView”. FB has other events such as “AddToCart”, “InitiateCheckout” etc. If you want to later track these events, we need to make a little change in the FB pixel code in the HTML section.
Remove the “PageView” event from the pixel code and paste it in a notepad temporarily.
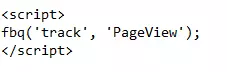
Then create a new tag for the “pageview” event and name it. I’ll name it “FB PageView”.
In the “Tag Configuration” section select the “Custom HTML” tag type again. Paste the pageview event like this:
Now we have to make sure that the main FB Base pixel will be fired before this tag. To do that click on “Advanced Settings” and find “Tag sequencing”. Here make sure to add the Facebook base pixel tag to fire before this tag. Set it like this:
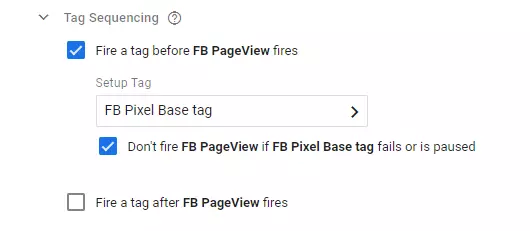
Please note that you may have named your base tag and event tag differently. That is not a problem, just make sure the correct tag is selected.
Save the tag and close it. Publish your changes to make them live.
You can add other Facebook events in a similar way to your GTM container.
This is how you can properly set up GTM on your website. If you have any questions, just leave a comment below.